The Comfort of Oreo Sushi: Fun 2-Ingredient Dessert Everyone Will Love Recipe
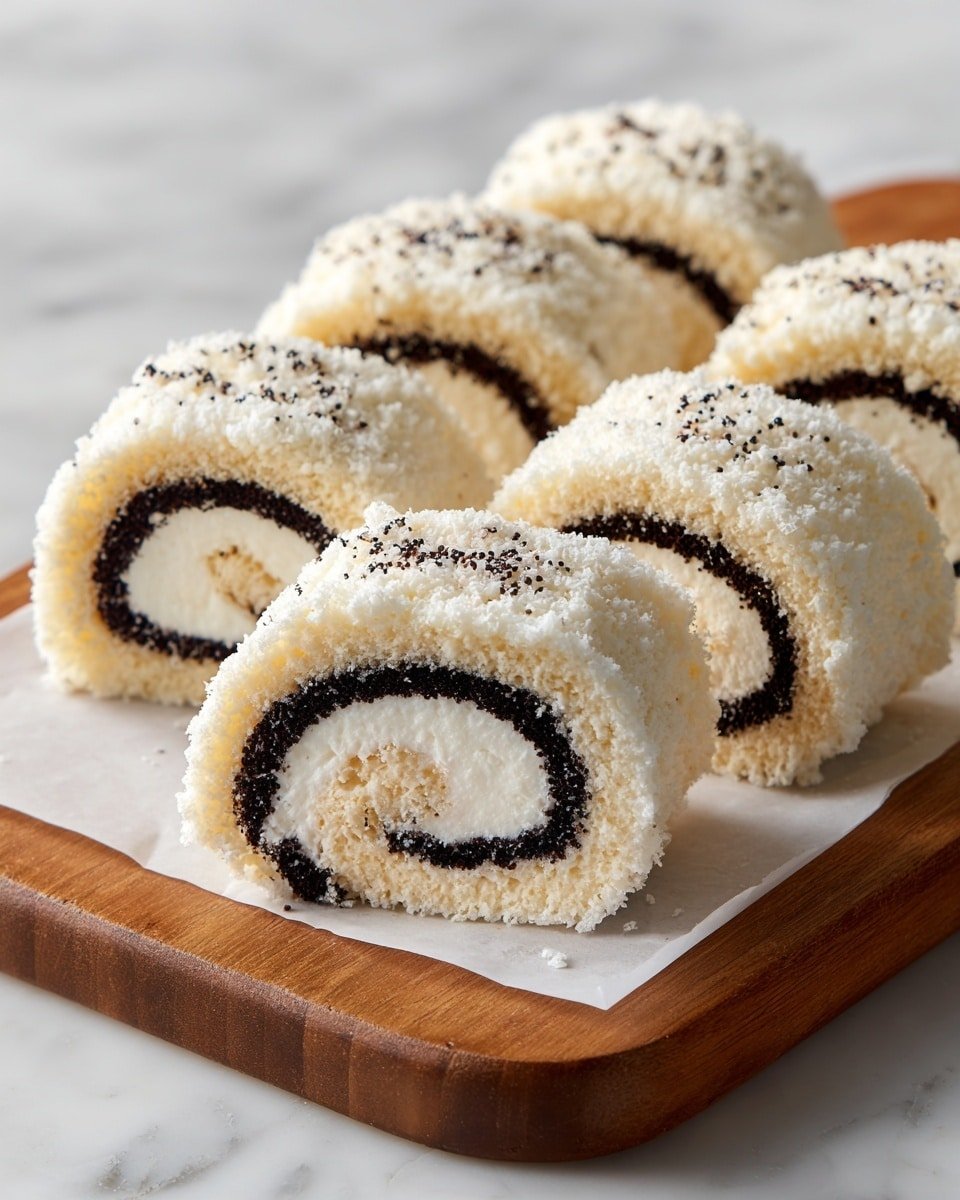
There’s something wonderfully nostalgic about Oreos, isn’t there? I love how their crunchy, chocolatey texture and sweet cream filling instantly bring back memories. But when you turn that classic cookie into Oreo Sushi, you transform it into something playful, unexpected, and absolutely delicious. This Oreo Sushi: Fun 2-Ingredient Dessert Everyone Will Love Recipe has quickly become my go-to when I want a no-fuss sweet treat that’s as fun to make as it is to eat. You’ll notice the magic lies in the simplicity — just Oreos and milk come together to create a velvety, lightly crisp roll that’s perfect for sharing. Whether you’re whipping it up for friends or indulging in a quiet moment, this recipe invites you to enjoy the process and savor the results. Trust me, the kitchen will fill with that comforting aroma, and you’ll end up with a dessert everyone asks for again. I know sometimes desserts can feel intimidating, but this Oreo Sushi is refreshingly approachable. You don’t need fancy skills or elaborate ingredients. Just a little patience and a rolling pin, and you have a golden, sweet roll that’s perfect for dipping, drizzling, or just enjoying plain. Let me walk you through it.🔥
What Makes It Irresistible
- Layered flavor: Comforting, rich, and beautifully balanced.
- Easy method: Steps designed for any skill level.
- Adaptable: Works with pantry swaps and seasonal twists.
- Prep-friendly: Can be made ahead without losing quality.
Ingredient Guide
- 24 Oreo Cookies: The star of the show. Any flavor you like will work—classic original, golden, or even mint for a twist.
- 2-3 tablespoons Milk: Binds the cookie crumbs into a creamy, moldable paste. You can use dairy or plant-based milk — almond or oat give a subtle nuttiness.
- Optional Add-Ins: Fresh fruits like strawberries or bananas add juiciness and brightness.
- Chocolate Sauce: For drizzling, a luscious touch that turns this into an even more decadent treat.
- Crushed Nuts or Sprinkles: Adds a delightful crunch and playful color, making the sushi visually fun.
Prep Before You Begin
To save yourself frustration, I always recommend getting all your ingredients ready and tools gathered before you dive in. This mise en place keeps the process smooth and enjoyable. No oven involved here — just chill time — so there’s no waiting for heat-up or cooling down. This also means the recipe is perfect for a warm day when you want a cool, no-bake treat.🧂
Tools & Setup
Here’s what you’ll want on hand so your Oreo Sushi: Fun 2-Ingredient Dessert Everyone Will Love Recipe comes together smoothly—plus optional extras that make the process even easier.- Mixing bowl for combining crumbs and milk
- Zip-top bag to crush Oreos easily without mess
- Rolling pin to finely crush the cookies
- Plastic wrap to shape and roll the sushi tightly
- Sharp knife for clean, neat slices
How to Make Oreo Sushi: Fun 2-Ingredient Dessert Everyone Will Love Recipe
- Separate the Oreos by gently twisting apart each cookie. Carefully place the cream filling in a bowl and set the cookie halves aside. I find this step so satisfying — the contrast of chocolate shell and velvety cream feels like unwrapping a little gift.
- Crush the separated Oreo halves in a zip-top bag using a rolling pin. Go slow and steady until you get fine crumbs—the texture should feel almost like soft sand, which helps create a smooth sushi roll texture.
- Mix the cookie crumbs in a mixing bowl and gradually add milk, just a tablespoon at a time. You want a thick paste that’s pliable but not wet. This is the key—to get that lightly crisp outer layer but still easily rollable.
🚀
Expert Tips to Nail It
Small adjustments that make a big difference in texture, timing, and flavor so your Oreo Sushi: Fun 2-Ingredient Dessert Everyone Will Love Recipe turns out reliably amazing.- Lay out a sheet of plastic wrap on a flat surface. Spread the cookie paste evenly into a neat rectangle—you want the sushi roll to look clean and inviting when sliced.
- Layer the cream filling over the cookie paste rectangle. This creamy layer contrasts beautifully against the denser chocolate crumb base, mimicking the luscious filling in classic sushi rolls.
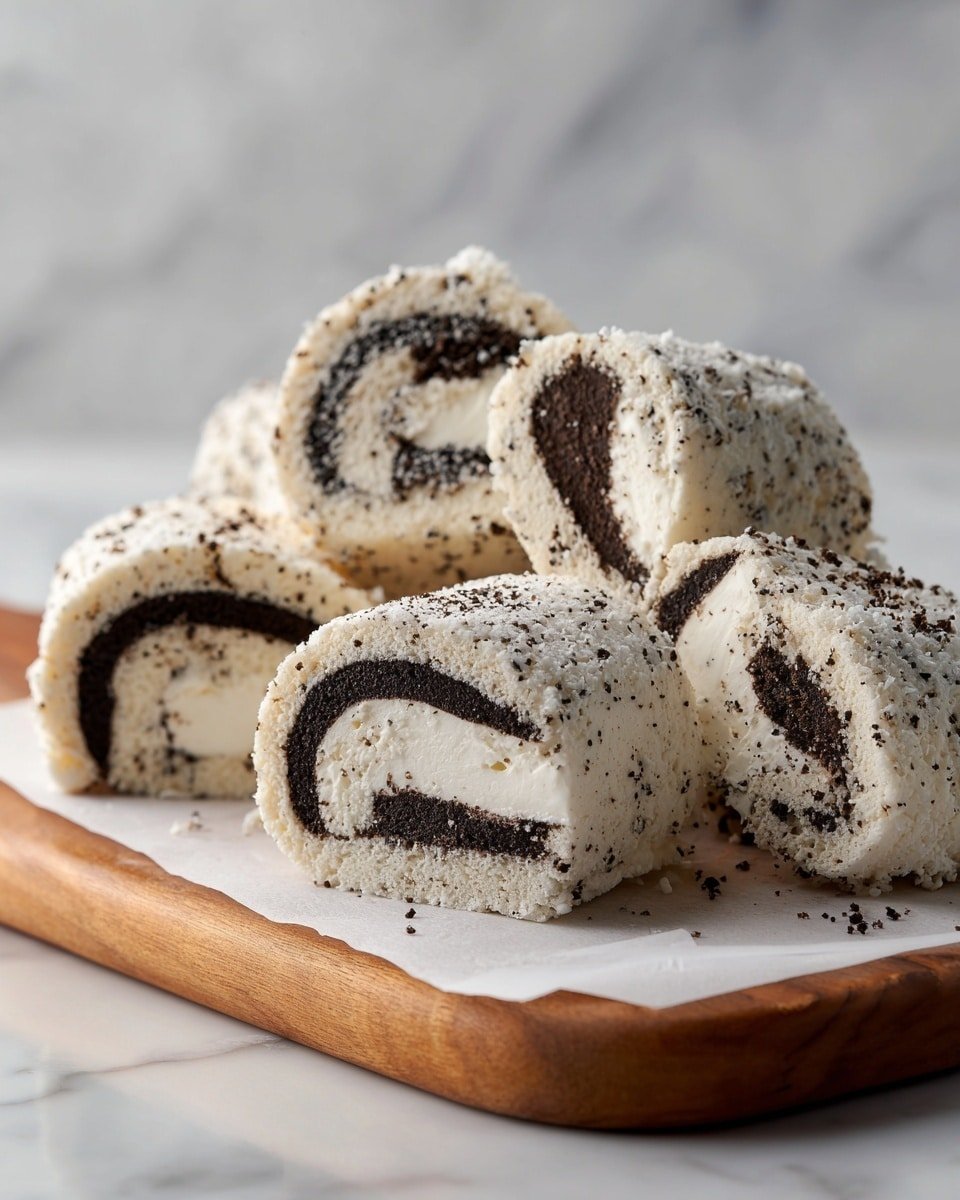
- Roll the sushi tightly using the plastic wrap, securing the ends. This tight roll traps everything together so your sushi slices won’t fall apart. Then, chill in the refrigerator for 30 minutes to set. I like using this time to clean up or prepare any dipping sauces.
- After chilling, unwrap and slice the roll into bite-sized pieces with a sharp knife. You’ll notice how clean and uniform each piece looks—perfect for sharing and impressive for guests.
- Arrange the sushi pieces on a plate. Drizzle with chocolate sauce or sprinkle crushed nuts or sprinkles if you like. Serve immediately and enjoy the fun, playful experience.
Creative Variations for Oreo Sushi: Fun 2-Ingredient Dessert Everyone Will Love Recipe
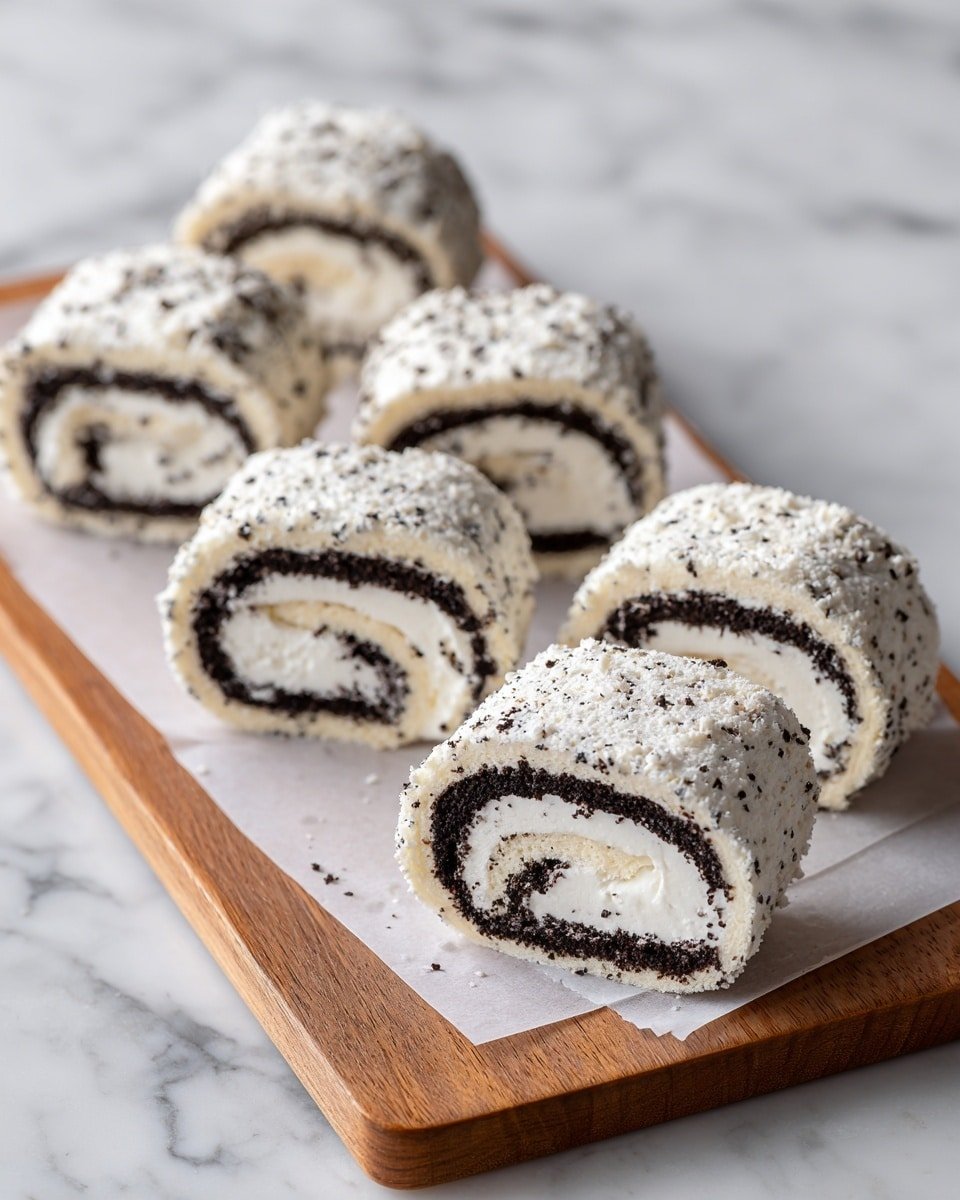
- Add thin slices of strawberries or banana on the cream layer before rolling for a fruity surprise in every bite.
- Try flavored Oreos like mint, golden, or birthday cake for an easy change in profile.
- Sprinkle shredded coconut on the outside for extra texture and a tropical feel.
- Drizzle with caramel sauce instead of chocolate for a buttery twist.
- For a more grown-up treat, add a dash of espresso powder to the cookie crumbs — the bitterness complements the sweet cream beautifully.
- Use crushed nuts on top for a lovely crunchy contrast.
Storage, Freezing & Reheating
- Store leftovers covered in the refrigerator for up to 3 days to keep freshness.
- Freezing isn’t recommended, as the texture may change once thawed.
- Serve chilled for best texture; no reheating needed.
- If the roll softens too much after refrigeration, a quick chill on a tray before serving can help firm it up.
Oreo Sushi: Fun 2-Ingredient Dessert Everyone Will Love Recipe FAQs
- Can I use plant-based milk? Absolutely! Almond, oat, or soy milk work well and add subtle flavor variations.
- What if I don’t have a rolling pin? A heavy glass or even a canned good will work to crush the Oreos.
- How do I keep the roll from falling apart? Rolling tightly with plastic wrap and chilling well helps it hold its shape beautifully.
- Can I make it vegan? Use vegan Oreo cookies and plant-based milk for a vegan-friendly version.
- Is there a substitute for Oreos? You can try similar sandwich cookies, but Oreos have a perfect balance that works best.
Oreo Sushi: Fun 2-Ingredient Dessert Everyone Will Love Recipe
Oreo Sushi is a delightful and creative 2-ingredient dessert that transforms classic Oreo cookies into fun sushi-style rolls. This easy-to-make treat combines crushed Oreo crumbs with milk to create a sweet cookie paste that’s rolled with the original cream filling and chilled for a unique and delicious bite-sized dessert. Perfect for parties, kids, or anyone looking for a playful twist on a beloved snack.
- Prep Time: 15 minutes
- Cook Time: 0 minutes
- Total Time: 45 minutes (including chilling time)
- Yield: Approximately 24 bite-sized pieces
- Category: Dessert
- Method: No-Cook
- Cuisine: American
Ingredients
For the Sushi Rolls
- 24 Oreo Cookies (any variety)
- 2-3 tablespoons Milk (dairy or plant-based alternatives)
Optional Add-Ins
- 1 cup Fresh Fruits (strawberries or bananas, sliced)
- Chocolate Sauce (for drizzling, to taste)
- Crushed Nuts or Sprinkles (for texture and fun, to taste)
Instructions
- Separate Oreos: Twist apart each Oreo cookie carefully, placing the cream filling into a separate bowl. Set the cookie halves aside for crushing.
- Crush Oreo Halves: Place the separated cookie halves in a zip-top bag and crush them using a rolling pin until fine crumbs form, ensuring an even texture for the paste.
- Make Cookie Paste: Transfer the crushed Oreo crumbs to a mixing bowl and gradually add 2 to 3 tablespoons of milk, stirring continuously until a thick and moldable paste forms.
- Assemble the Roll: Lay a large sheet of plastic wrap on a clean flat surface. Spread the cookie paste evenly into a rectangle shape on the plastic wrap. Carefully layer the separated cream filling evenly over the paste.
- Roll the Sushi: Using the plastic wrap to help, tightly roll the cookie paste and cream filling into a sushi roll shape. Secure the ends by twisting the plastic wrap tightly to maintain the shape.
- Chill the Roll: Place the wrapped roll into the refrigerator and chill for 30 minutes. This helps the roll firm up for easy slicing.
- Slice and Serve: Remove the chilled roll from the fridge, unwrap the plastic wrap, and use a sharp knife to slice it into bite-sized sushi pieces. Arrange on a plate and serve with optional fresh fruits, chocolate sauce drizzles, or crushed nuts for added texture and flavor.
Notes
- For a dairy-free version, use plant-based milk alternatives such as almond, soy, or oat milk.
- Choose Oreo varieties like Double Stuf or flavored Oreos to customize the taste.
- Add fresh fruit slices inside the roll for a fruity surprise inside your dessert sushi.
- Chilling the roll is essential for clean slicing and maintaining the sushi shape.
- Use a very sharp knife to prevent the roll from squishing while slicing.
- Store leftover sushi rolls in an airtight container in the refrigerator for up to 2 days.


