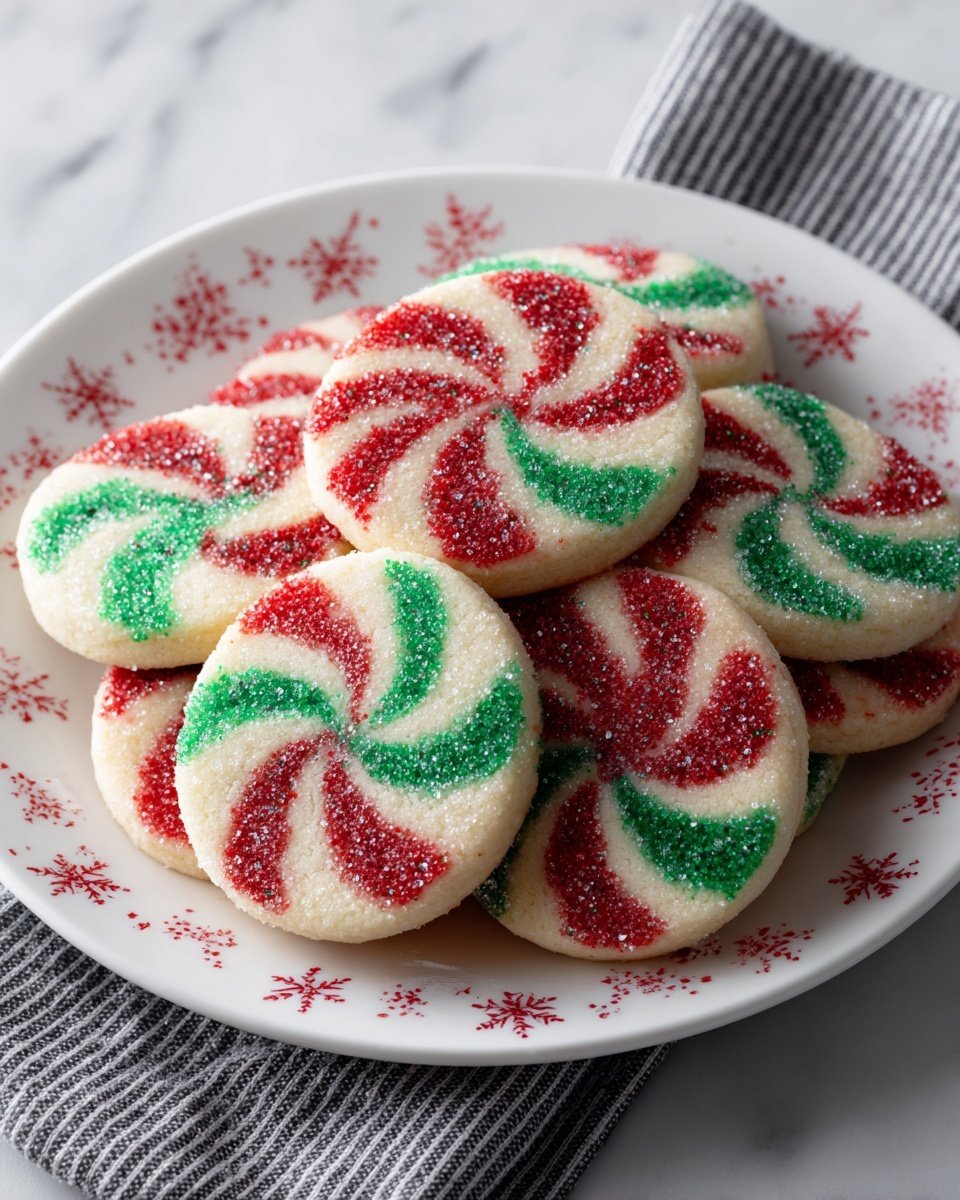
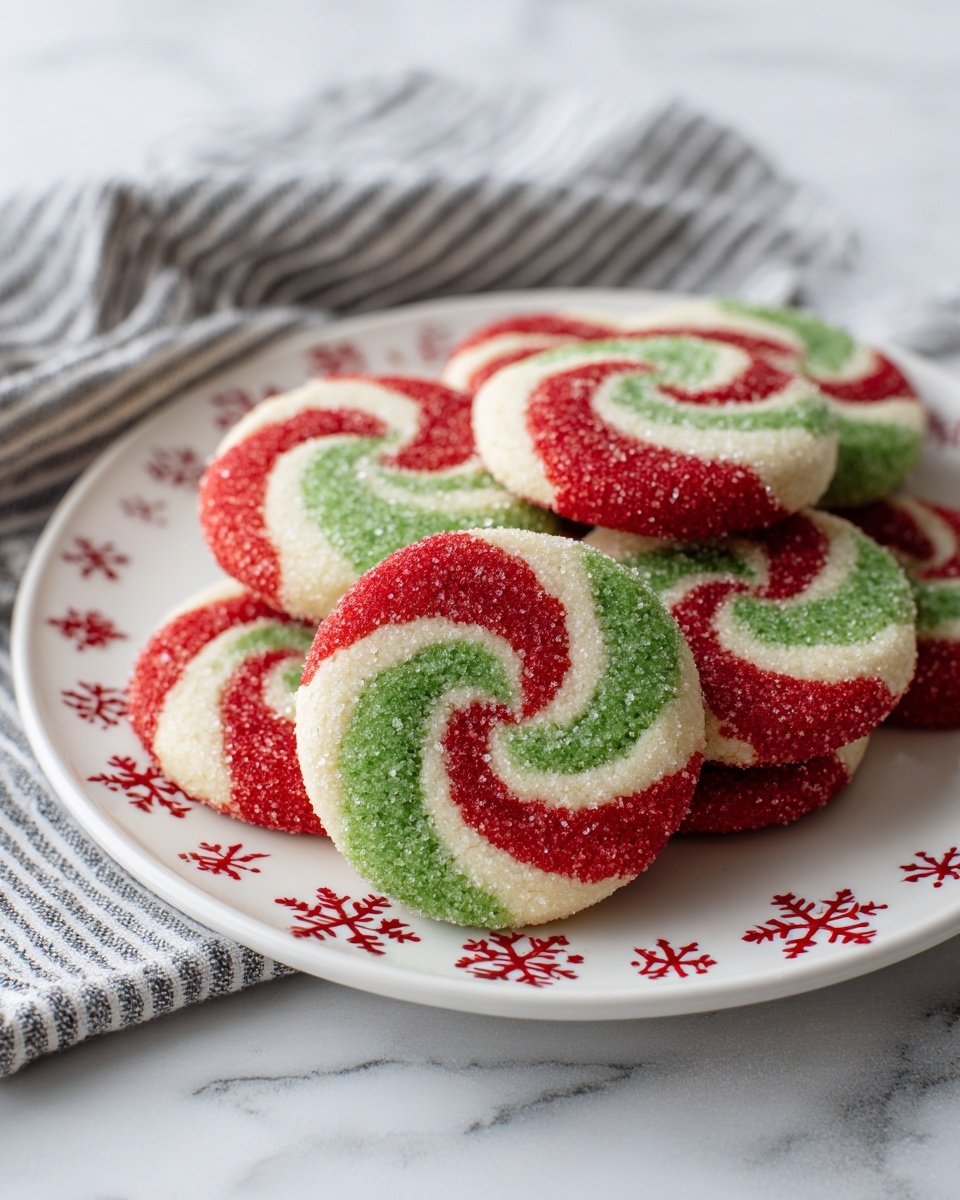
The Comfort of Christmas Pinwheel Cookies Recipe
There’s something wonderfully nostalgic about Christmas Pinwheel Cookies—their cheerful swirl of red, green, and white takes me right back to cozy afternoons spent baking with family. I love how these cookies bring that familiar holiday warmth, wrapped up not just in flavor but in festive joy. The buttery dough, speckled with colorful sprinkles, smells as heavenly as they look, making the whole kitchen feel like celebration central.
As you prepare this Christmas Pinwheel Cookies Recipe, you’ll notice how the layers of dough gently unfold to reveal their iconic pattern, a little surprise in every bite. The texture is spot-on: lightly crisp on the edges yet soft and delicate inside. It’s exactly the kind of cookie that steals the show on any holiday platter and disappears way too fast.
Let me share a few secrets and stories from my kitchen—these cookies aren’t just festive, they’re comforting in the best way. Perfect for sharing with loved ones or a quiet treat with a cup of tea on a wintry afternoon.
What Makes It Irresistible
- Layered flavor: Comforting, rich, and beautifully balanced.
- Easy method: Steps designed for any skill level.
- Adaptable: Works with pantry swaps and seasonal twists.
- Prep-friendly: Can be made ahead without losing quality.
Ingredient Guide
- Salted butter (¾ cup): The foundation of richness and tender crumb—room temperature is key here for smooth mixing.
- Granulated sugar (¾ cup) & powdered sugar (¾ cup): Both create that perfect balance of sweetness and a subtle crunch in the bite.
- Large eggs (2): These bind everything together and add moisture—fresh eggs always bake best.
- Vanilla extract (2 tsp): Brings warmth and depth, though you can experiment with almond or lemon extracts for a twist.
- All-purpose flour (2 ½ cups): The structure that holds these cookies together, sifted for even mixing.
- Baking powder (½ tsp) & salt (½ tsp): These enhance rise and flavor intricacy—don’t skip the salt, it balances sweetness.
- Red & green gel food coloring: Gel colors give vivid hues without watering down the dough.
- Holiday colored nonpareils: Adds festive sparkle and a tiny crunch coating the outside.
- Optional flavorings: Lemon zest or an extra ½ teaspoon of your favorite extract brighten or deepen the cookie’s character beautifully.
Prep Before You Begin
Before diving into this Christmas Pinwheel Cookies Recipe, make sure to soften your butter well—this really makes a difference in texture. I like to measure out all ingredients and prep parchment paper-lined baking sheets early so everything flows smoothly. Preheat your oven to 350°F before you start rolling and cutting; it’ll be ready just when you need it. Don’t rush the chilling stages—that downtime helps keep that beautiful pinwheel pattern intact when slicing.
Tools & Setup
Here’s what you’ll want on hand so your Christmas Pinwheel Cookies Recipe comes together smoothly—plus optional extras that make the process even easier.
How to Make Christmas Pinwheel Cookies Recipe
- Beat the butter and sugars: In your mixer, combine softened butter with both granulated and powdered sugars. I love watching the mixture transform into a pale, fluffy cloud—this means you’ve incorporated plenty of air, which leads to a lighter cookie.
- Add eggs and vanilla: Crack in the eggs one at a time, adding the vanilla and any other optional flavor like lemon zest now. Scrape the bowl sides to ensure even blending—you’ll get a beautifully glossy dough that’s smooth and inviting.
- Incorporate dry ingredients: Mix in the flour, baking powder, and salt until just combined. The dough will feel soft but firm enough to handle. Divide it evenly into three balls for coloring.
- Color your dough: Return one-third of the dough to the mixer bowl. Add 5-10 drops of red gel food coloring and mix until evenly tinted. Repeat with green gel food coloring for another third. The remaining dough stays white, creating that classic pinwheel color palette.
- Chill the dough discs: Flatten each ball into a disc, wrap tightly in plastic, and chill in the freezer for 20 minutes or the fridge for about an hour. Chilling relaxes the gluten, making rolling easier and preventing cracking.
Expert Tips to Nail It
Small adjustments that make a big difference in texture, timing, and flavor so your Christmas Pinwheel Cookies Recipe turns out reliably amazing.
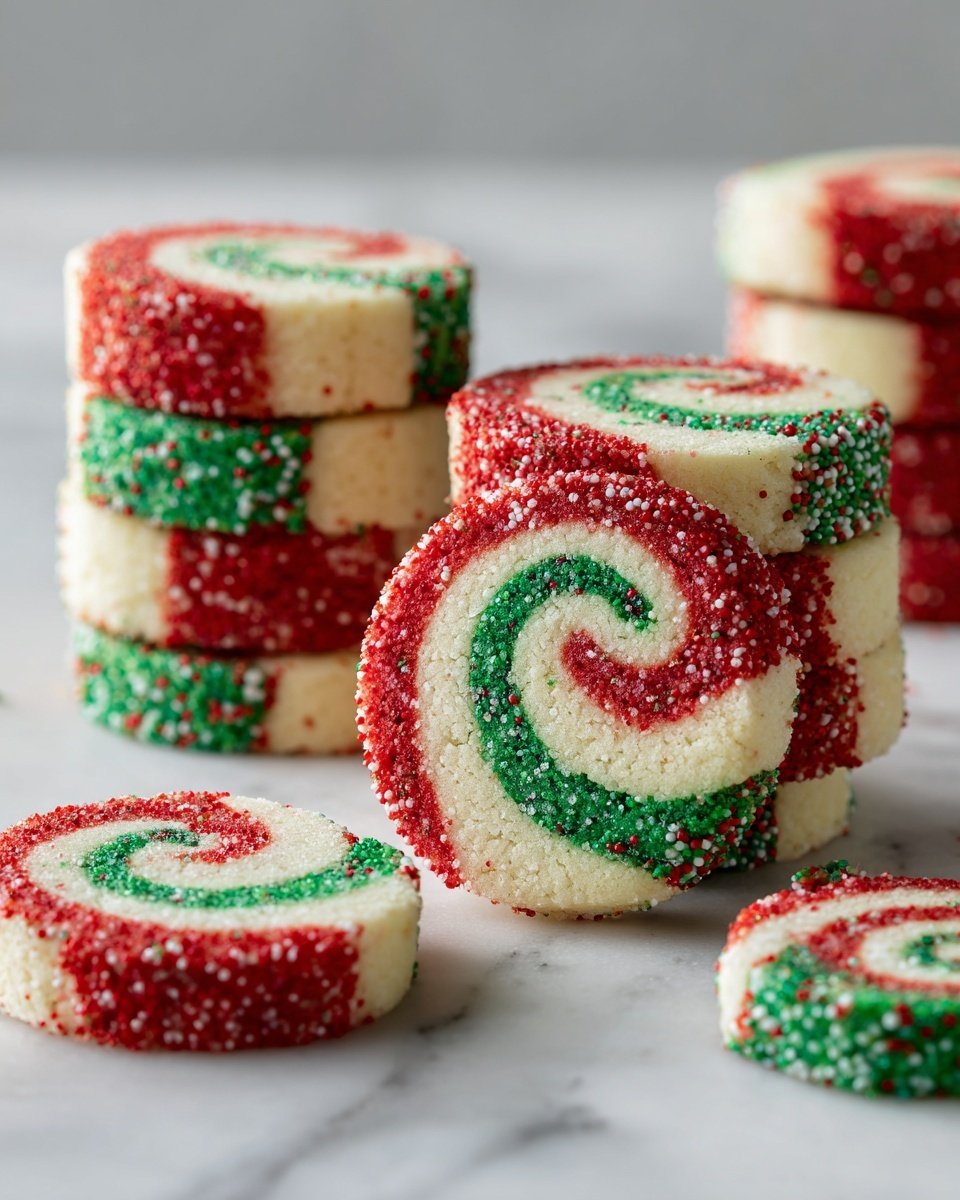
- Roll out dough rectangles: On lightly floured parchment paper, roll each chilled disc into a rectangle of roughly equal size—about 1/8-inch thick. Stacking the layers with white dough in the middle and red and green on top and bottom creates that signature swirl when rolled.
- Trim and stack: Trim the long edges of your stacked dough to even out the sides. The shorter ends can wait until you roll the dough into a log. This step ensures a neat, professional-looking pinwheel.
- Roll into a log: Using the parchment paper like a sling, roll your layered dough carefully into a tight log. This is where patience pays off—tight rolling prevents cracking and keeps layers distinct.
- Chill the log: Wrap your dough log snugly in plastic wrap, then chill in the fridge for at least 1-2 hours. This rest firms it up, making slicing clean and even.
- Add the finishing touch: Pour your holiday colored nonpareils on a baking sheet. Roll the chilled log in the sprinkles, pressing gently so they stick for that festive, crunchy coating. You can now slice and bake or refrigerate the log for up to a week.
- Preheat and prepare to bake: When ready, heat the oven to 350°F and line your baking sheet with parchment paper.
- Slice and bake: Remove the plastic, trim the uneven log ends, then slice into 1/4-inch rounds with a sharp knife. Space them 1-2 inches apart on your baking sheet. Bake for 10-12 minutes until the edges set and the cookies hold their colorful spirals beautifully.
- Cool completely: Transfer cookies to a wire rack to cool fully. This cooling step is crucial to let them firm up to that perfect buttery texture you’re aiming for.
Creative Variations for Christmas Pinwheel Cookies Recipe
- Substitute peppermint extract for vanilla to add a cool, refreshing holiday twist to the dough.
- Mix in finely chopped nuts—pistachios or walnuts add a lovely crunch and earthy complexity.
- Use natural food colorings like beet powder or spinach for a subtle, wholesome hue.
- Swap nonpareils for crushed candy canes for a minty bite and delightful sparkle.
- Try layering with a thin spread of raspberry jam inside before rolling for a fruity surprise.
- Create a chocolate peppermint version by mixing cocoa powder into the white dough layer.
Storage, Freezing & Reheating
- Store baked cookies in an airtight container at room temperature for up to 1 week—if they last that long!
- Freeze unbaked dough logs wrapped tightly in plastic wrap for up to 1 month. Slice and bake straight from the fridge after thawing overnight.
- Baked cookies can be frozen in a single layer for 2-3 months; thaw at room temperature before serving.
- Reheat cookies briefly in a low oven (300°F for 5 mins) to refresh that just-baked warmth and slight crispness.
Christmas Pinwheel Cookies Recipe FAQs
- Can I use unsalted butter instead? Yes, just add a pinch extra salt to balance sweetness and enhance flavor.
- What if the dough cracks while rolling? Chill it longer and work gently. Using parchment paper to roll helps prevent cracks and makes handling easier.
- Can I make these gluten-free? You can substitute with a gluten-free flour blend, but adjust liquids as needed. Texture may be slightly different.
- How thin should I roll the dough? Aim for about 1/8 inch thick for even baking and clean, visible pinwheels.
- Are these cookies suitable for freezing after baking? Absolutely! Just freeze after cooling and thaw before enjoying.
Christmas Pinwheel Cookies Recipe

These festive Christmas Pinwheel Cookies are a delightful holiday treat featuring colorful red, green, and white swirls with a crunchy nonpareil coating. Soft, buttery, and lightly sweetened, these visually charming cookies add a fun and flavorful touch to any holiday cookie platter. The dough is layered with vibrant gel food coloring, rolled tightly into a log, chilled, sliced, and baked to perfection with a sprinkle of holiday nonpareils for an extra festive flair.
- Prep Time: 15 minutes
- Cook Time: 10 minutes
- Total Time: 2 hours 25 minutes
- Yield: Approximately 36 cookies
- Category: Baking
- Method: Baking
- Cuisine: American
- Diet: Vegetarian
Ingredients
Cookie Dough
- 3/4 cup salted butter, softened to room temperature
- 3/4 cup (150g) granulated sugar
- 3/4 cup (150g) powdered sugar
- 2 large eggs
- 2 teaspoons vanilla extract
- 2 1/2 cups (353g) all-purpose flour
- 1/2 teaspoon baking powder
- 1/2 teaspoon salt
- Optional: 1/2-1 teaspoon of additional flavoring extracts or lemon zest
Coloring and Decoration
- Red gel food coloring
- Green gel food coloring
- Holiday colored nonpareils
Instructions
- Mix Butter and Sugars: In a mixing bowl, combine the softened butter, granulated sugar, and powdered sugar. Beat well using a mixer until the mixture is light, fluffy, and fully creamed, ensuring a smooth base for the dough.
- Add Wet Ingredients: Add the eggs, vanilla extract, and any optional flavoring extracts or lemon zest to the butter and sugar mixture. Mix thoroughly, scraping down the sides and bottom of the bowl to incorporate all ingredients evenly.
- Incorporate Dry Ingredients: Gradually mix in the all-purpose flour, baking powder, and salt until the dough just comes together. Avoid overmixing to keep the cookies tender. Divide the dough into three equal portions.
- Color the Dough: Place one-third of the dough back into the mixing bowl and add 5-10 drops of red gel food coloring. Mix well until the dough is uniformly colored. Repeat this process with another third of the dough and green gel food coloring. Leave the last third as is (white).
- Chill the Dough: Flatten each colored dough ball into a disc and wrap individually in plastic wrap. Chill the discs in the freezer for 20 minutes or refrigerate for 1 hour to firm up the dough for easier rolling.
- Roll Out and Stack: Roll each chilled dough disc out on parchment paper into rectangles of roughly the same size and shape. Stack the dough layers with the white dough in the middle and the colored doughs (red and green) on top and bottom. Trim the long edges to even them up, leaving the short ends to trim later.
- Roll into Log: Using the parchment paper to assist, carefully roll the stacked dough layers into a tight log, ensuring there are no cracks. Wrap the dough log in plastic wrap and chill in the fridge for 1 to 2 hours to firm before slicing.
- Coat with Nonpareils: After chilling, unwrap the dough log and gently press it into holiday-colored nonpareils spread on a baking sheet until the outside is well coated. This adds festive texture and color to the cookies.
- Slice the Cookies: Preheat the oven to 350°F (175°C). Line a baking sheet with parchment paper. Trim uneven ends from the dough log, then slice it into 1/4-inch thick cookies using a sharp knife. Place the cookies 1-2 inches apart on the baking sheet.
- Bake: Bake the cookies in the preheated oven for 10 to 12 minutes or until they are set but not browned. Remove from the oven and allow the cookies to cool completely on a wire rack before serving or storing.
Notes
- Use gel food coloring for vibrant colors without altering dough consistency.
- Chilling the dough is crucial to prevent spreading and maintain the pinwheel pattern.
- Press the dough firmly into the nonpareils to ensure good coverage and adherence.
- You can prepare dough logs in advance and store in the fridge for up to one week before slicing and baking.
- For extra flavor, add lemon zest or a complementary extract such as almond or peppermint into the dough.
- Use a sharp knife for clean, even cookie slices to avoid cracking or squashing the roll.