The Comfort of Easy Layered Banana Pudding Trifle Recipe
There’s something deeply soothing about a classic banana pudding — its layers of sweet cream, tender bananas, and crisp wafers feel like a warm hug on a plate. When I first discovered this Easy Layered Banana Pudding Trifle Recipe, it quickly became my go-to for family gatherings or a quiet weekend treat. It’s one of those desserts where each spoonful tells a story: golden pudding that’s velvety smooth, bananas that add fresh brightness, and Nilla Wafers lending just the right amount of crunch. You’ll notice this trifle is both comforting and surprisingly elegant, ready to serve straight from the fridge with minimal fuss. What I love most is how the flavors gently meld together after a few hours chilling — it’s like magic that turns simple ingredients into something special. Whether you’re an experienced cook or just looking for a hassle-free dessert to impress, this recipe truly delivers. Before we dive into the details, know this: this Easy Layered Banana Pudding Trifle Recipe is approachable, adaptable, and always hits the spot. So, grab your favorite trifle dish and let’s bring a little joy to the table.🔥
What Makes It Irresistible
- Layered flavor: Comforting, rich, and beautifully balanced.
- Easy method: Steps designed for any skill level.
- Adaptable: Works with pantry swaps and seasonal twists.
- Prep-friendly: Can be made ahead without losing quality.
Ingredient Guide
- Jell-O Cook and Serve Vanilla Pudding Mix (5 oz): The luscious base that creates a creamy, velvety texture. You can swap for homemade vanilla pudding if you prefer a scratch version.
- 7 Bananas, sliced: Adds natural sweetness and a fresh contrast to the creamy pudding. Choose ripe but firm bananas for the best texture without mushiness.
- 3 cups 2% Milk: Perfect for cooking the pudding — whole milk will make it richer, skim for a lighter option.
- 1 box Nilla Wafers: Their buttery crispness is key for layering — feel free to experiment with vanilla or chocolate wafer varieties for a twist.
- 1 (16 oz) container Cool Whip: Light, airy, and sweet, this adds fluffiness and balances the pudding’s rich texture. You can substitute with whipped cream for a fresher, less processed touch.
Prep Before You Begin
Before you start building your trifle, I always recommend setting out all ingredients and equipment — this makes the process feel calm and organized. Slice your bananas just before assembling to keep them from browning too quickly. Since we’re working with a cool dessert, no oven is needed, which is a relief on hot days! Chill your pudding for at least 5 minutes after cooking to reach the perfect consistency before layering.🧂
Tools & Setup
Here’s what you’ll want on hand so your Easy Layered Banana Pudding Trifle Recipe comes together smoothly—plus optional extras that make the process even easier.
How to Make Easy Layered Banana Pudding Trifle Recipe
- Prepare the pudding: In a medium saucepan over medium heat, whisk together the 3 cups of 2% milk and the Jell-O pudding mix. Stir constantly to prevent lumps, and watch as the mixture thickens and gently comes to a boil. This process takes a few minutes, but don’t rush—your patience ensures that pudding is smooth and velvety. Once thickened, transfer it to a mixing bowl and let it cool for at least 5 minutes. You’ll notice it sets up nicely, perfect for layering.
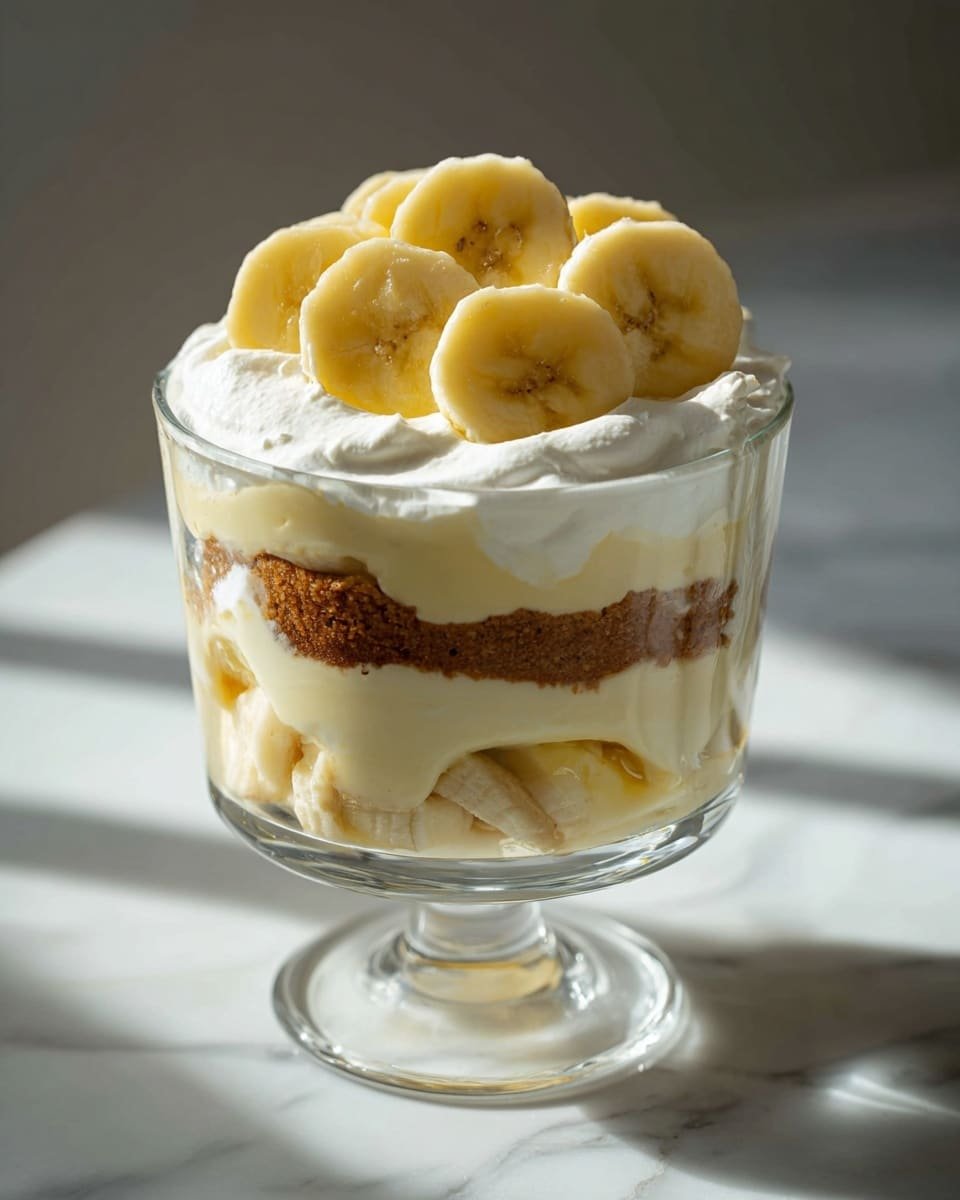
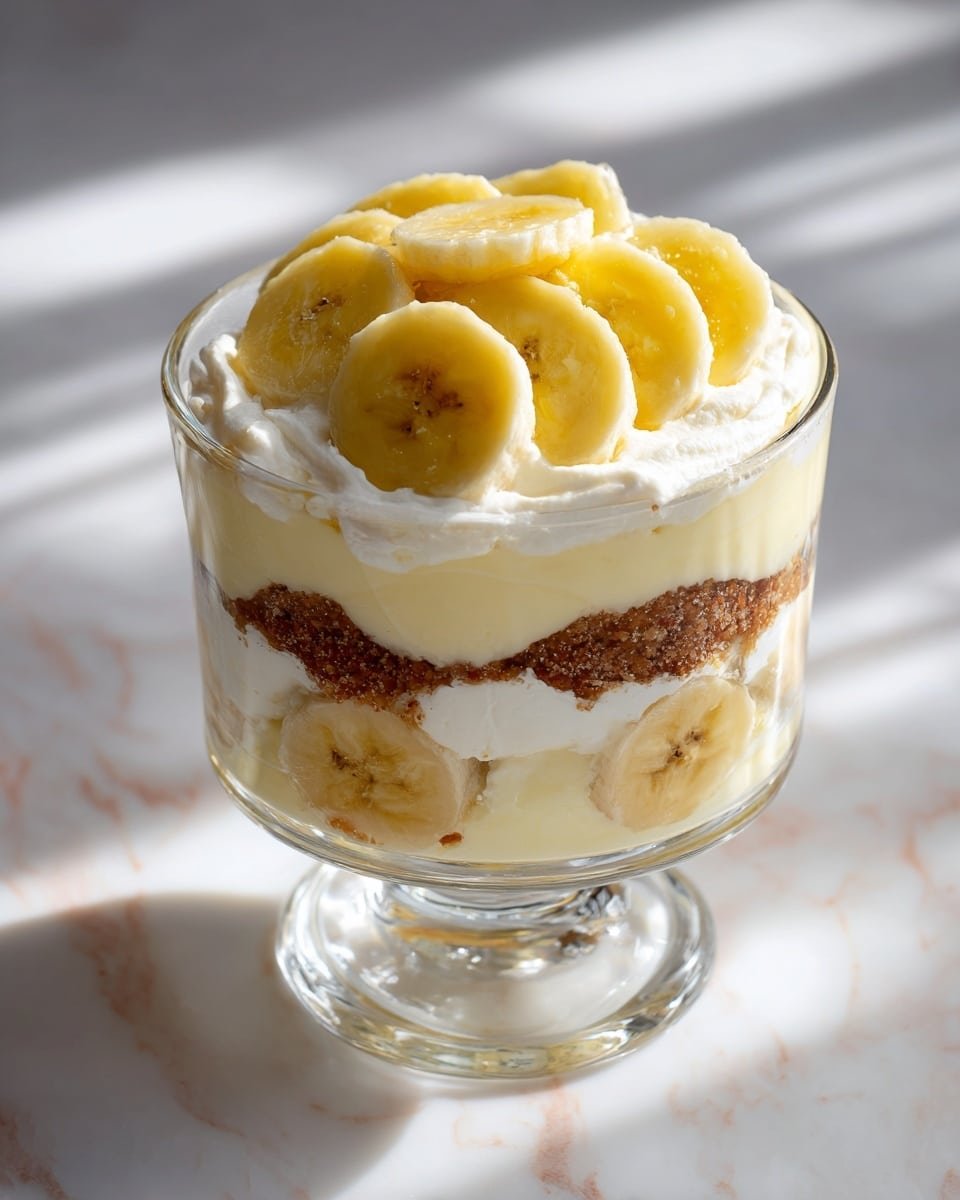
- Start layering: Grab your favorite trifle dish. Begin by spreading a layer of Nilla Wafers along the bottom; this creates a lightly crisp base that offsets the creamy layers. Then dollop a generous layer of Cool Whip, which adds lightness and a whipped sweetness. Follow with a spoonful of your cooled vanilla pudding — luscious and golden — and scatter a layer of freshly sliced bananas on top. The bananas bring a fresh and tropical aroma that pairs beautifully with the pudding. Finish the first round with another layer of wafers.
🚀
Expert Tips to Nail It
Small adjustments that make a big difference in texture, timing, and flavor so your Easy Layered Banana Pudding Trifle Recipe turns out reliably amazing.
- Repeat the layering: Continue the sequence—Nilla Wafers, Cool Whip, pudding, and bananas—layer after layer until your trifle dish is nearly full. Don’t be shy with the Cool Whip; it keeps things fluffy and light. The wafer layers add delightful texture throughout, balancing creaminess and fruitiness with every bite.
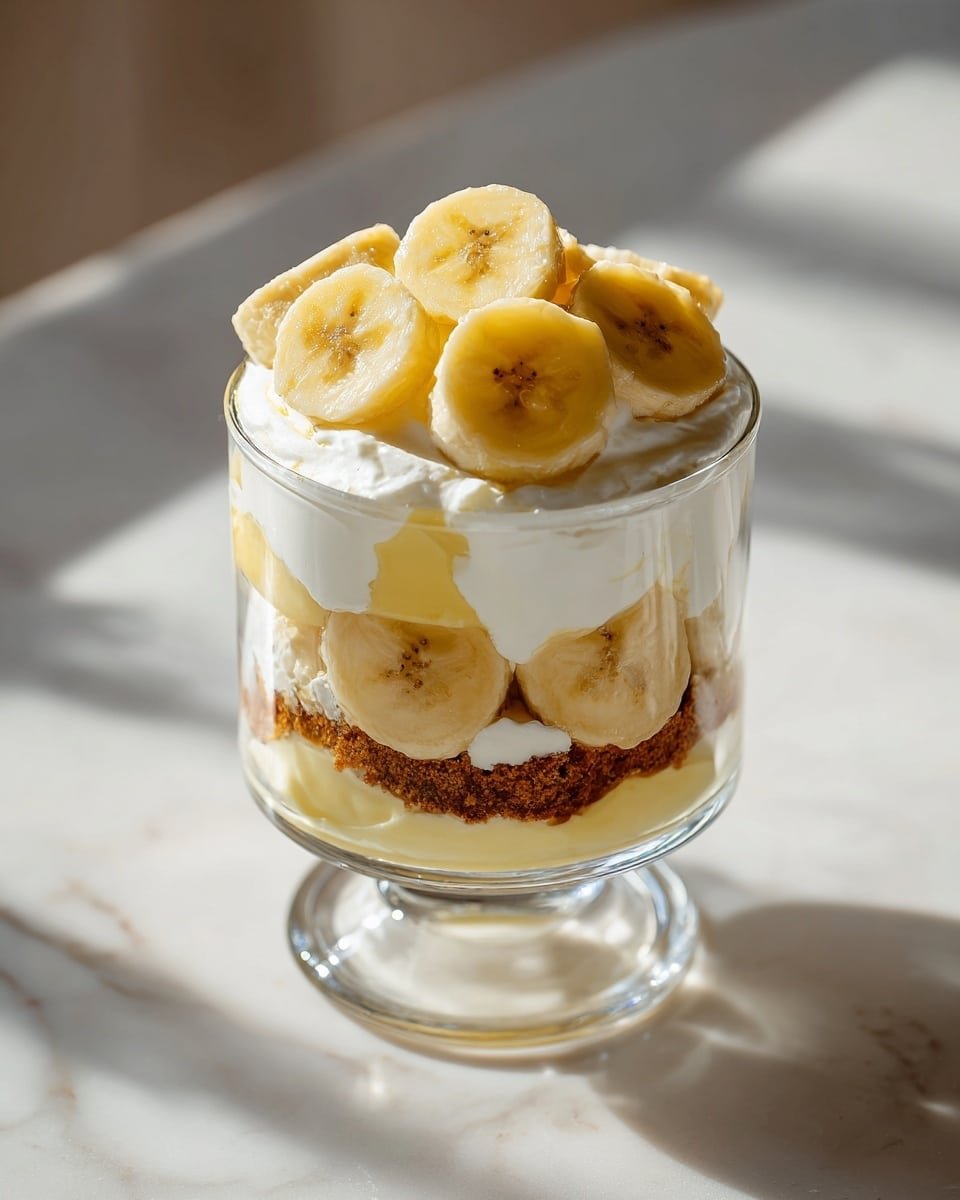
- Top and decorate: For the final flourish, place a last layer of wafers and banana slices on top. I like to crumble a few extra wafers over this layer to add a rustic crunch that looks inviting and tastes amazing. The golden color of the pudding peeking through the layers makes for a lovely presentation.
- Chill thoroughly: This step is essential. Refrigerate your trifle for at least 2-3 hours, though ideally overnight. The flavors meld, the wafers soften just enough without losing their character, and the pudding settles into a dreamy, sliceable texture. Visitors will love how each flavor layer shines through.
- Serve and enjoy: When you scoop into this trifle, you’ll find a perfect harmony of creamy vanilla pudding, airy whipped topping, fresh bananas, and crispy wafers. Every bite is a comforting celebration — ideal for sharing or indulging solo on a lazy afternoon.
Creative Variations for Easy Layered Banana Pudding Trifle Recipe
- Add a splash of coffee liqueur or rum to the pudding for an adult twist and a subtle depth of flavor.
- Swap out bananas for fresh strawberries or mixed berries to add a tart contrast and vibrant color.
- Use chocolate pudding instead of vanilla, layering with cocoa-flavored wafers for a chocolate-banana delight.
- Sprinkle chopped toasted pecans or walnuts between layers for extra crunch and warmth.
- Top with freshly grated dark chocolate or cacao nibs for a sophisticated garnish.
Storage, Freezing & Reheating
- Refrigerate: Best enjoyed within 3 days of preparation. Keep it tightly covered to preserve freshness and prevent the bananas from browning too much.
- Freeze: This trifle doesn’t freeze well due to the whipped topping and fresh bananas, which might change texture—better to make fresh or finish the pudding portion ahead.
- Reheat: Not recommended; this dessert shines served chilled and fresh.
- Make ahead: You can prepare all components except the bananas up to a day in advance, then slice bananas and assemble just before serving for a fresher finish.
Easy Layered Banana Pudding Trifle Recipe FAQs
- Can I use homemade pudding instead of the mix? Absolutely! Homemade vanilla pudding adds a personal touch, just be sure it’s thick enough to hold the layers.
- How do I prevent bananas from browning? Slice them fresh right before layering. You can also toss slices briefly in lemon juice to slow browning if you want to prep in advance.
- What if I don’t have Cool Whip? Whipped cream is a perfect substitute and adds a fresh, natural flavor. Just whip it lightly with a bit of sugar.
- Can I make individual servings instead? Definitely! Use small parfait glasses or ramekins and layer the ingredients the same way for a charming presentation.
- Is there a gluten-free alternative to Nilla Wafers? Yes, you can use gluten-free vanilla cookies or wafers to keep the texture and flavor intact.
Easy Layered Banana Pudding Trifle Recipe
This Easy Layered Banana Pudding Trifle is a delightful no-bake dessert combining creamy vanilla pudding, sliced fresh bananas, crunchy Nilla Wafers, and fluffy Cool Whip. Perfect for gatherings or a sweet treat, this dessert layers luscious textures and flavors in a beautiful trifle dish, requiring minimal prep time and simple ingredients.
- Prep Time: 10 minutes
- Cook Time: 10 minutes
- Total Time: 25 minutes
- Yield: 8 servings
- Category: Dessert
- Method: Stovetop
- Cuisine: American
- Diet: Vegetarian
Ingredients
For the Pudding
- 1 large box (5 oz) Jell-O Cook and Serve Vanilla pudding mix
- 3 cups 2% milk
Other Ingredients
- 7 bananas, sliced
- 1 box Nilla Wafers
- 1 (16 oz) container Cool Whip
Instructions
- Prepare the Pudding: In a saucepan over medium heat, combine the milk and Jell-O vanilla pudding mix. Stir constantly to avoid lumps and cook until the mixture starts to boil. Remove from heat and transfer the pudding to a mixing bowl, then allow it to cool for at least 5 minutes to thicken properly.
- Layer the Trifle: In your trifle dish, begin by placing a layer of Nilla Wafers on the bottom. Add a layer of Cool Whip, then spread a layer of the cooled pudding over that. Follow with a layer of sliced bananas and then another layer of Nilla Wafers.
- Repeat Layers: Continue layering in the order of Cool Whip, pudding, bananas, and Nilla Wafers. Repeat until your trifle dish is filled or you run out of ingredients, ensuring beautiful visible layers.
- Top and Decorate: Finish with a final layer of Nilla Wafers and banana slices on top. For an attractive garnish, crumble a few extra wafers and sprinkle them over the surface to add texture and visual appeal.
- Chill: Place the trifle in the refrigerator and chill until ready to serve. This chilling time allows the flavors to meld and the wafers to soften slightly, creating a perfectly balanced dessert.
Notes
- Use ripe but firm bananas to prevent mushiness in the layers.
- For a richer pudding, substitute 2% milk with whole milk or half-and-half.
- Prepare the pudding ahead of time and refrigerate to save time before assembling.
- You can substitute Cool Whip with fresh whipped cream for a less processed option.
- Keep the dessert refrigerated until served to maintain texture and freshness.


